Using Xamarin.Forms Shell to Define Flyout Navigation
Learn how to use Xamarin.Forms Shell to define a Flyout menu for your app. In this article we will cover how to use the Xamarin.Forms Shell to create a flyout navigation menu for our app.
Xamarin.Forms 4.0 introduced a new feature called Shell, in this article we will cover how to use the Xamarin.Forms Shell to create a flyout navigation menu for our app.
Introduction
Xamarin.Forms Shell, dramatically simplifies the process of setting up Navigation for your mobile application. In this article we'll be going over the basics of how to setup flyout navigation using Xamarin.Forms Shell.
As per previous articles, we are going to use the Australian Government Design System as the definition for our demonstration.
Setting up Xamarin.Forms Shell
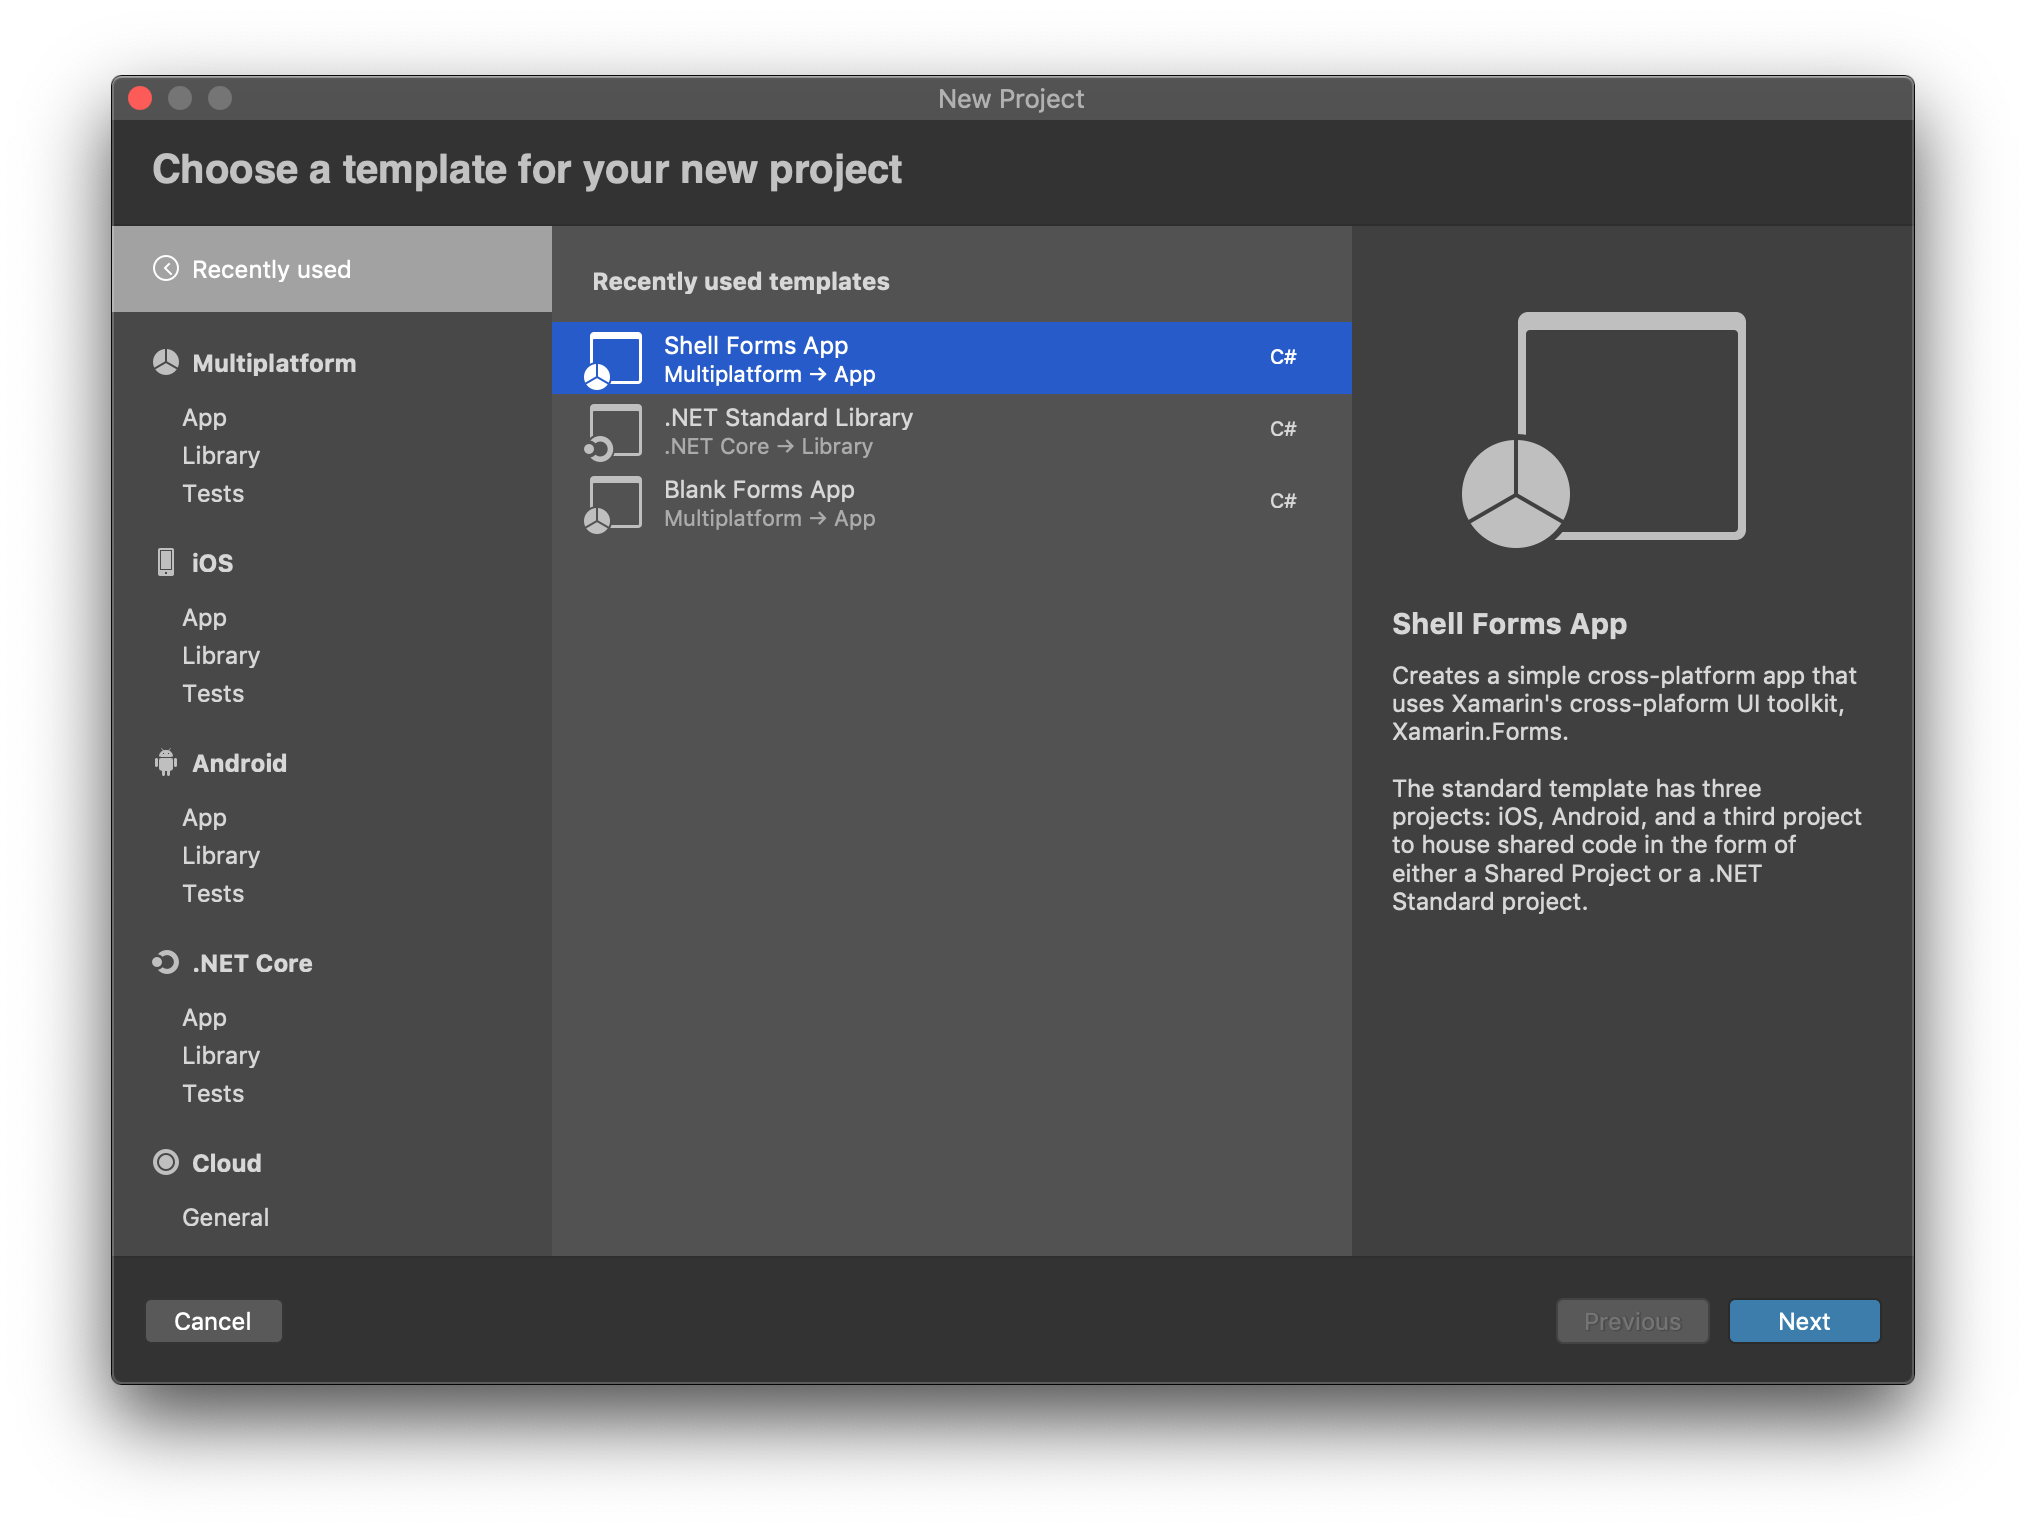
The easiest way to get started with Xamarin.Forms Shell is to create a new application using the Shell Forms App template from within Visual Studio, as per the below screenshot.
Alternatively if you have an existing application you'd like to start using Xamarin.Forms Shell on, follow these steps.
First step is to create your Xamarin.Forms Shell by creating a new AppShell.xaml and AppShell.xaml.cs file in the root of your Xamarin.Forms project. The easiest way to do this, is to just create new "Forms ContentPage XAML" from within Visual Studio's file creation dialog as follows.

Once you have created the AppShell files, change the xaml file to look like the following:
<Shell xmlns="http://xamarin.com/schemas/2014/forms" xmlns:x="http://schemas.microsoft.com/winfx/2009/xaml" xmlns:d="http://xamarin.com/schemas/2014/forms/design" xmlns:mc="http://schemas.openxmlformats.org/markup-compatibility/2006" Title="MyApp" x:Class="MyApp.AppShell">
</Shell>
Next modify your AppShell.cs file, so that AppShell inherits from Xamarin.Forms.Shell.
public partial class AppShell : Xamarin.Forms.Shell
{
  public AppShell()
  {
    InitializeComponent();
  }
}
Lastly we need to ensure that our main Application class, uses our new Xamarin.Forms Shell as it's MainPage.
public partial class App : Application
{
  public App()
  {
    InitializeComponent();

    MainPage = new AppShell();
  }
}
Defining Flyout Navigation with Xamarin.Forms Shell
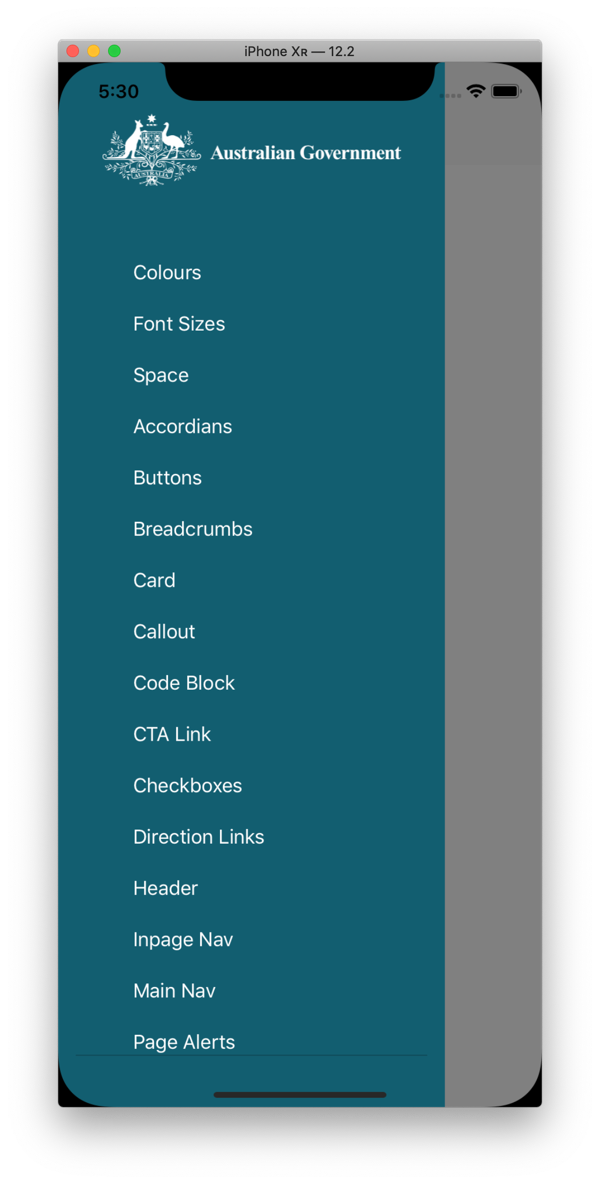
Now that we've got our basic Xamarin.Forms Shell files in place, we'll define our flyout navigation. For our example we are going to create navigation items for each of the design system components that we are going to create as part of this series of posts.
For each flyout menu item we want to create, we need to create a FlyoutItem element within our AppShell.xaml file. The "Title" attribute determines what text is shown in the flyout menu.
Under each FlyoutItem we need to define the content that will be navigated to when the user selects the menu item in the flyout menu. The below example shows how to define a set of flyout menu items, that navigate to an empty content page.
<Shell xmlns="http://xamarin.com/schemas/2014/forms" xmlns:x="http://schemas.microsoft.com/winfx/2009/xaml" xmlns:d="http://xamarin.com/schemas/2014/forms/design" xmlns:mc="http://schemas.openxmlformats.org/markup-compatibility/2006" Title="MyApp" x:Class="MyApp.AppShell">
  <FlyoutItem Title="Colours">
    <Tab>
      <ShellContent>
        <ContentPage/>
      </ShellContent>
    </Tab>
  </FlyoutItem>
  <FlyoutItem Title="Font Sizes">
    <Tab>
      <ShellContent>
        <ContentPage/>
      </ShellContent>
    </Tab>
  </FlyoutItem>
  <FlyoutItem Title="Space">
    <Tab>
      <ShellContent>
        <ContentPage/>
      </ShellContent>
    </Tab>
  </FlyoutItem>
  <FlyoutItem Title="Accordians">
    <Tab>
      <ShellContent>
        <ContentPage/>
      </ShellContent>
    </Tab>
  </FlyoutItem>
  ...
</Shell>
Styling Xamarin.Forms Shell Flyout Menu Items
We can use the Shell.ItemTemplate property to control the look and feel of our Xamarin.Forms Shell Flyout menu items. The below example shows how we can embed standard Xamarin.Forms Layouts and Controls to render our menu items.
<Shell.ItemTemplate>
  <DataTemplate>
    <StackLayout HorizontalOptions="StartAndExpand">
      <Label Text="{Binding Title}" TextColor="{StaticResource ColorForegroundTextDK}" VerticalOptions="Center" HorizontalOptions="Start" Margin="64,0,0,0" />
    </StackLayout>
  </DataTemplate>
</Shell.ItemTemplate>
To get the title of the menu item into our template, we simply bind to the Title field using:
Text="{Binding Title}"Summary
In this article we covered the basics of setting up Xamarin.Forms shell, and how to define a basic Flyout menu. Xamarin.Forms Shell is a great tool for helping you reduce the time developing your apps, and provides you with a standard approach to solving a very common problem.
This is part of my "Implementing a design system in Xamarin.Forms" series of posts.
Contact me at https://www.pattern.co.nz .
References
https://docs.microsoft.com/en-us/xamarin/xamarin-forms/app-fundamentals/shell/flyout