Handling Errors with Xamarin.Forms and ReactiveUI
Introduction
In this article, we are going to walk through how to use ReactiveUI and Xamarin.Forms to handle errors that may occur in our application.
Setting up Logging using Splat
Splat is utilized by ReactiveUI and provides a number of different services which help with cross platform development. In this article, we will be using the Service Locator and Logging components of Splat.
The first thing we want to do is setup logging in our application. To do this we first want to create a simple logging class, which implements the Splat.ILogger interface.
public class Logger : ILogger
{
	public void Write(string message, LogLevel logLevel)
	{
        if ((int)logLevel < (int)Level) return;

        Debug.WriteLine(message);
	}

	public LogLevel Level { get; set; }
}
We then need to register this logger, as the default logging service to use in our Service Locator. The following code simply creates a new instance of our Logger class and then register it using the Splat Service Locator.
public partial class App : Application
{
    public App()
    {
    ...

        var logger = new Logger() { Level = LogLevel.Debug };

   Locator.CurrentMutable.RegisterConstant(logger, typeof(ILogger));

    ...
    }
}
Logging Exceptions with ReactiveUI and Splat
Now that we've setup logging for our app, we can now start to use the various logging tools that ReactiveUI and Splat provide.
Before we start you should add the IEnableLogger interface to the class declaration.
In our ArticlesViewModel we want to log any errors that are thrown from the LoadArticles command. To do this we simply listen for all thrown exceptions on the command and call the Log method which in turn calls the Splat logger.
public class ArticlesViewModel : ReactiveObject, IEnableLogger
{
...
public ArticlesViewModel()
{
    ...
    LoadArticles.ThrownExceptions.Log(this);
Presenting Errors using ReactiveUI Interactions
In a lot of cases, you are going to want to present some kind of indicator to the user that an exception has occurred.
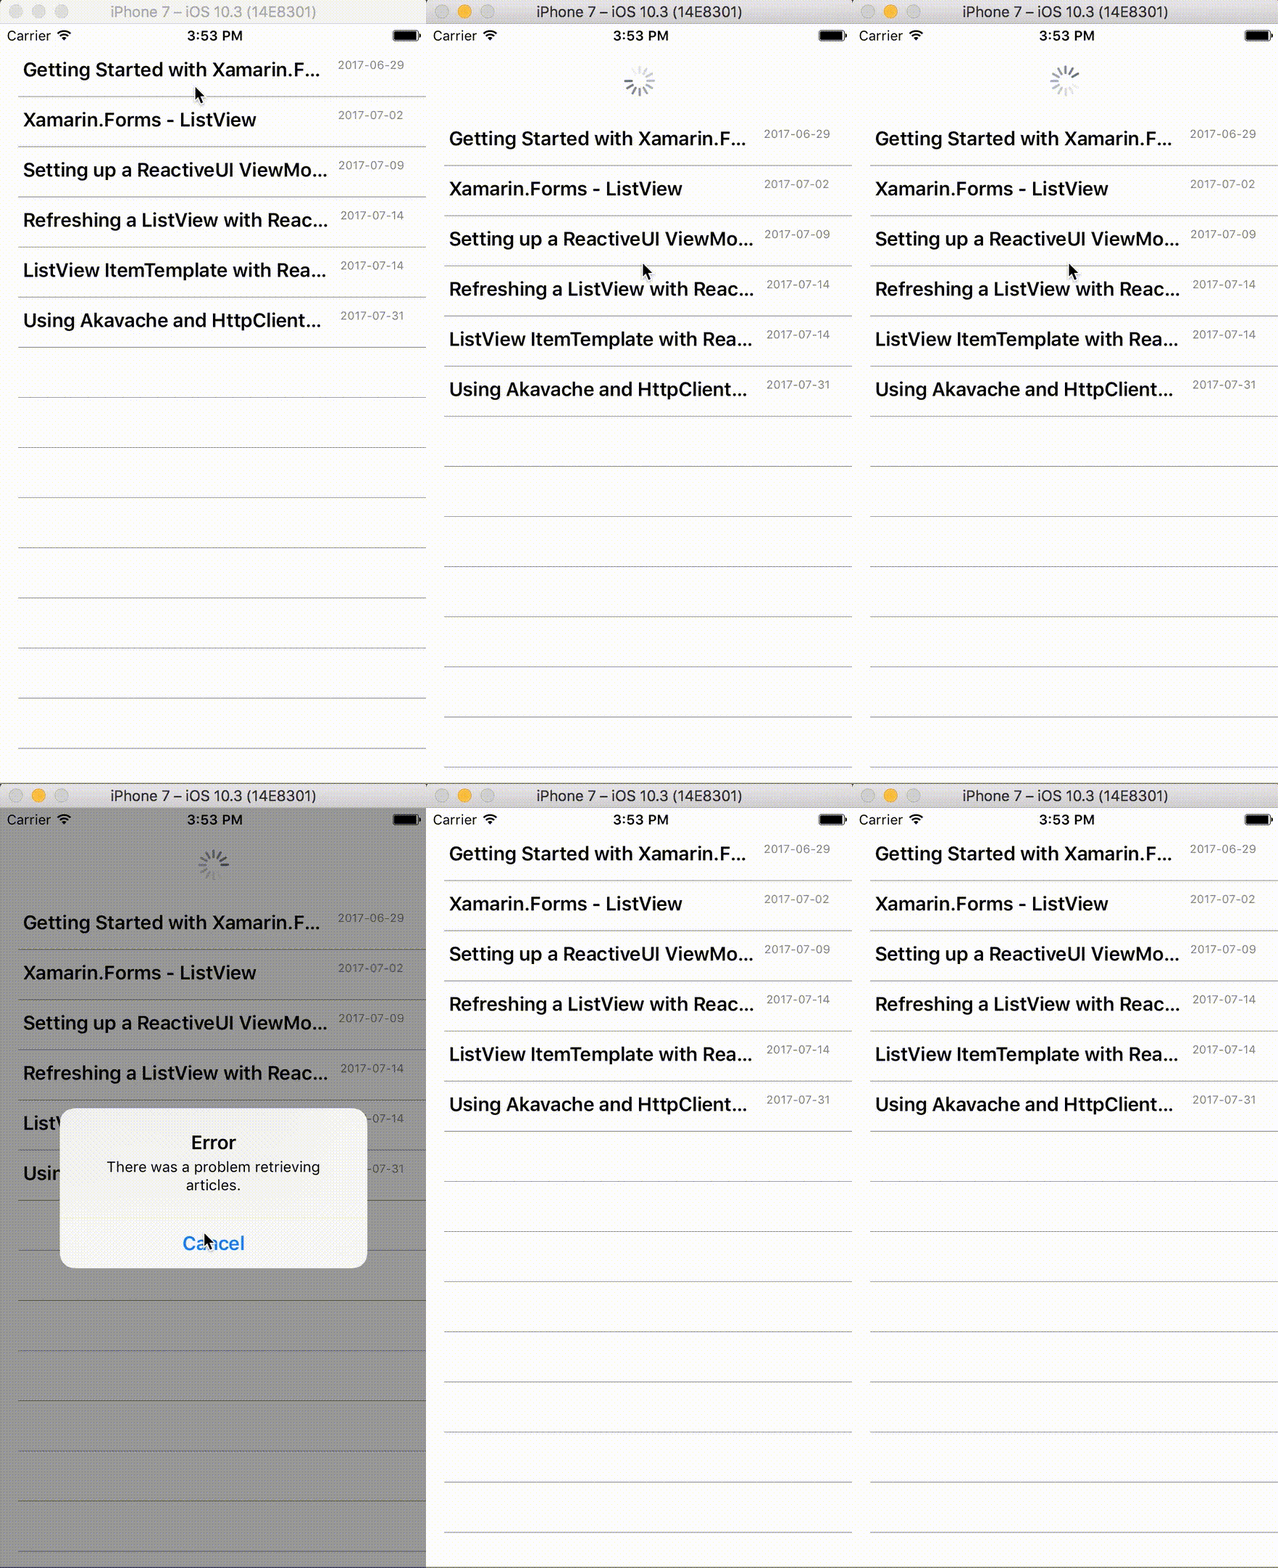
In our example we want to show the user an alert when an exception occurs on the LoadArticles command.
We first want to declare a new ReactiveUI Interaction in our ViewModel. Interactions allow your Views to bind a two-way interaction to the ViewModel. In our case we want to show an Alert which the user will have to interact with before it will allow the user to do anything further inside of the app. Interaction's are a generic type which allow you to specify the input and output types for the interaction. So input might be the error message, and output would be, did user click ok or cancel.
readonly Interaction<string, Unit> _showError;
Once we have declared our Interaction, we then need to invoke it using the Handle method. In our example we are going to invoke the Handle method when an exception is thrown from the LoadArticles command. To do this, we simply subscribe to the ThrownExceptions observable property of the LoadArticles command. Note that we are observing on the RxApp.MainThreadSheduler to ensure that our Alert is executed on the main UI thread.
public class ArticlesViewModel : ReactiveObject, IEnableLogger {

readonly Interaction<string, Unit> _showError;
...
public ArticlesViewModel()
{
...
    _showError = new Interaction<string, Unit>();
    LoadArticles.ThrownExceptions
                .Log(this)

 .ObserveOn(RxApp.MainThreadScheduler)
                .Subscribe(async x =>
                {
                    await ShowError.Handle("There was a problem retrieving articles.");
                });
We now need to bind our View to the new ReactiveUI Interaction on our ViewModel.
public partial class ArticlesPage : ContentPage, IViewFor<ArticlesViewModel>
{
...
    protected override void OnAppearing()
    {
    ...
    this.ViewModel.ShowError.RegisterHandler(async interaction => {
                await DisplayAlert("Error", interaction.Input, "Cancel");
                Articles.EndRefresh();
                interaction.SetOutput(Unit.Default);
            });
    ...
...
}
Recovering from Errors using Reactive Extensions
It's often the case with mobile applications, that network connectivity can be patchy at times, so for our sample application we are going to implement network request retries when we detect an error has occurred.
Rx has a built in method for retrying failed events, this is called Retry. The problem with Retry is that it executes immediately after execution, which doesn't make sense to use in our case, as we'd like to retry after a set amount of time.
In order to achieve this, we are going to create an extension method for IObservable's that will retry after a specified amount of time. Further, we will increase the amount of time between retries as the retry count increases.
Our extension method will be called RetryWithDelay, and will take a single parameter called retryCount, which specifies the maximum amount of retries we would like to perform in case of failure.
Here is the code for our extension method.
public static class IObservableMixins
{
	public static IObservable<T> RetryWithDelay<T>(
		this IObservable<T> source,
        int retryCount)
	{
		var attempt = 0;

		return Observable.Defer(() =>
		{
            var delay = TimeSpan.FromSeconds(Math.Pow(attempt++, 2));
            var observable = attempt == 1 ? source : Observable.Timer(delay).SelectMany(_ => source);

            return observable;
		})
		.Retry(retryCount)
		.SelectMany(x => Observable.Return(x));
	}
}
The most interesting part of this method is inside of the Observable.Defer method call. This defines an action which does the following:
- If this is the first attempt, then execute the incoming observable immediately
- If this is not the first attempt, then create a new Observable using the Observable.Timer method which returns an Observable that pauses execution of the Observable stream for a set amount of time, and then returns the incoming observable.
All we need to do now is add our new RetryWithDelay method to our Observable chain as shown below. In the example below, we retry three times, if an exception happens in the preceding code.
public class ArticleService : IArticleService
{
    public IObservable<IEnumerable<Article>> Get()
    {
        var url = $"{Configuration.ApiBaseUrl}Articles.json";
        return Observable.FromAsync(() =>
        {
            return new HttpClient().GetAsync(url);
        })
        .SelectMany(async x =>
        {
            x.EnsureSuccessStatusCode();
            return await x.Content.ReadAsStringAsync();
        })
        .RetryWithDelay(3)
        .Select(content => JsonConvert.DeserializeObject<Article[]>(content));
    }
}
Summary
In this article we've covered the basics of logging with ReactiveUI and Splat, as well as exception handling and ReactiveUI Interactions. As you can see ReactiveUI and Rx provide some really elegant ways of dealing with logging and exception handling.
Full source code for this article can be found here:
https://github.com/jamilgeor/FormsTutor/tree/master/Lesson07

References
https://github.com/reactiveui/splat
https://stackoverflow.com/questions/20189166/rx-back-off-and-retry